Overview
Now that you have created your activities, let's look at how to book them in Zaui Core (back office). This article will go over the booking process for Rental activities.
This article will cover the following topics:
- Home Page
- Booking One Type of Equipment
- Booking Different Types of Equipment
- Checkout/Payment Screen
Dashboard
- Using the calendar widget on the home page of your system, select the date you wish to make a booking on.
- Your page will refresh with relevant availability; click on the Rental activity you wish to book on the dashboard.
There are two scenarios for booking Rental activities. One where you are only booking one type of equipment ( ie - bikes, all same brand/size), or another scenario where you offer different types of equipment which are divided into different rental activities.
Scenario 1 - Booking One Type of Equipment
- From the desktop (home page), select a date and the Rental activity you wish to book.
- The next screen is your rental equipment screen, where you can see existing bookings (and what equipment they are booked onto) and make a new booking. In the example below, Test Rental is booked on Bike #2 from 12:00-14:00.
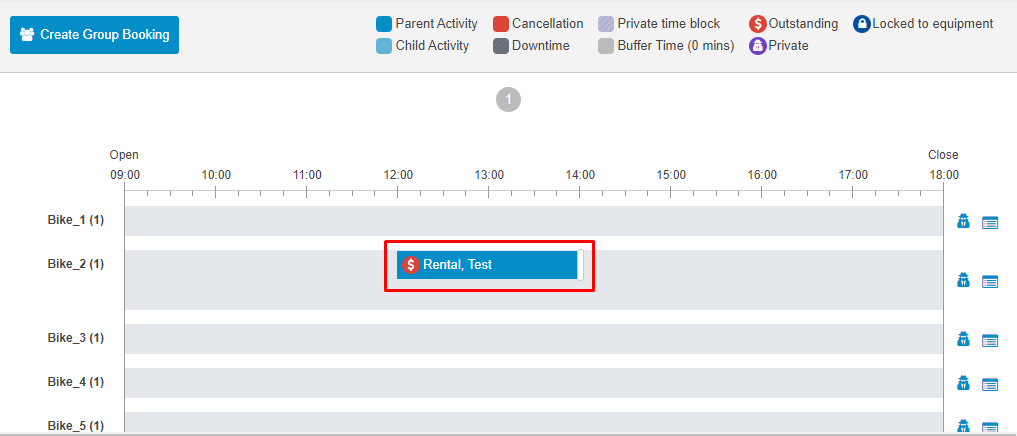

The rental equipment screen provides you with a great drag and drop feature to move existing bookings to different pieces of equipment or time slots. Simply click and hold on to the existing booking and drag it elsewhere on the screen. You can also extend the booking time by dragging the right side of the booking entry. - The best way to create a Rental booking is by using the Create Group Booking button, which allows you to select multiple passengers for one reservation.

- Once Create Group Booking is selected, a pop-up screen will appear. Here, you can fill in the details of the booking:
-
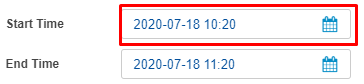
Customize the Start and End Time of the rental, but clicking on the date/time.
- First and Last Name of customer.
- Email.
- Phone Number.
- Passengers (each passenger selected will be given a piece of equipment, ie - 1 bike per passenger)
- Any Notes related to the booking (public).
Scenario 2 - Booking Different Types of Equipment
If you rent out different types of equipment (ie - different sized bikes) you will have to set up separate Rental activities for each different equipment type. Below are the steps to make a booking that includes different types of equipment.
- From the desktop (home page), select a date and the Rental activity you wish to book.
- On the rental equipment screen, click on Create Group Booking.
- Follow Steps 5 through 10 (above) when entering booking details.
- Click on Add To Cart.
- You will be brought to the Shopping Cart Contents page where you can click on Continue Shopping from the shortcuts panel.
- Then, select your next Rental activity (a different piece of equipment) you need to add to your existing booking.
- In the rental equipment screen, click on Create Group Booking again.
- In the pop-up window, next to the Customer field, select the Customer you have created in your first booking. By doing this, you will add this second booking under the same reservation as the first, while selecting a different equipment type.

- Continue the above process if you wish to add other types of equipment to the booking.
Once you have added your customers to your booking, there are two ways of completing the booking:
Booking Without Payment
- Click on Book Without Payment to make a quick booking/hold space.
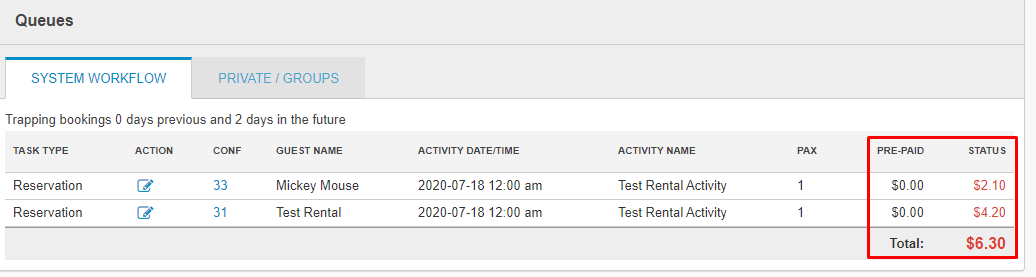
- On the main dashboard (home page), you will notice any bookings with outstanding payments listed under the System Workflow tab of the Queues section at the bottom of the page.
- Simply click on the Edit button and on the Activity Name on the following page to edit booking and process payment.
Add to Cart
- Click on Add to Cart to be brought to the Shopping Carts Content page. On the shortcuts panel, you can select Continue Shopping if you want to book any other activities or click on Checkout to continue to the payment screen.
Checkout/Payment Screen
Once on the payment screen, follow these steps:
- Review the booking and confirm that it has been booked correctly (to modify click on the Shopping Cart symbol on the top right-hand corner of the window).
- Scroll to the bottom of the page.
- Select the desired Method of Payment.
- Enter all payment details including Amount to Process.
- Click Process Booking.
- If required, note the Confirmation Number or Booking Reference ID now assigned at the top of the next page for future reference.
